n8n Installation on Ubuntu 24.04 with Caddy and Automatic SSL Certificates


Are you interested in the product presented? Get in touch with us! At WZ-IT we take care of consulting, installation, support, operation, maintenance and monitoring of your solution. Arrange your free and non-binding consultation here: Schedule a meeting.
n8n is a powerful open source workflow automation platform that allows you to connect different services and APIs. As an alternative to commercial solutions such as Zapier or Make, n8n offers full control over your automations and data. In this guide, we will show you how to install n8n on an Ubuntu 24.04 server with PostgreSQL database and automatically set up SSL certificates from Let's Encrypt with Caddy.
Table of Contents
- Prerequisites
- Step 1: Prepare the Server
- Step 2: Install Docker and Docker Compose
- Step 3: Create User for n8n
- Step 4: Set Up Directory Structure
- Step 5: Configure Environment Variables
- Step 6: Set up Caddy as Reverse Proxy
- Step 7: Docker Compose Configuration
- Step 8: Start n8n
- Step 9: Initial Configuration & User Management
- Firewall Configuration
- Backup & Updates
- Conclusion
Prerequisites
- An Ubuntu 24.04 server (e.g. a VPS from Hetzner or another provider)
- Access to the server via SSH
- Domain pointing to the server (at least A entry) (e.g.
n8n.example.com)
In our example, we use the domain n8n-demo.wz-it.com. You can replace this domain with your own domain in the instructions. We have set the domain with an A entry to the IP address of the server on which we want to install n8n.
Step 1: Prepare the Server
We log on to the server via SSH as root or a user with sudo rights and update the package list:
apt update && apt upgrade -y
Step 2: Install Docker and Docker Compose
curl -fsSL https://get.docker.com -o get-docker.sh
sh get-docker.sh
rm get-docker.sh
This script installs the latest version of Docker and Docker Compose. Please have a look at the content of the script to understand what exactly happens. In general, it is not a good idea to run scripts from the internet blindly, but in this case it is a common method to install Docker.
Step 3: Create User for n8n
We create a new user that will later be used for the n8n installation. We also add the user to the Docker group so that they can execute Docker commands without sudo. This is important because n8n runs in a Docker container and the user needs access to the Docker resources.
adduser --system --group --home /opt/n8n n8n
sudo usermod -aG docker n8n
Step 4: Set Up Directory Structure
We change to the user directory and create the necessary directories:
cd /opt/n8n
sudo -u n8n mkdir -p n8n_data caddy_config local_files
- n8n_data stores encryption keys, logs and source control assets
- local_files enables file access in workflows (e.g. read/write file node)
- caddy_config contains the caddy configuration (caddy file)
Note: Workflows, credentials and execution data are stored in the PostgreSQL database, while the n8n_data directory contains important system data such as encryption keys.
Step 5: Configure Environment Variables
Create the .env file with the necessary configurations:
sudo -u n8n nano .env
Insert the following content:
DOMAIN_NAME=wz-it.com
SUBDOMAIN=n8n-demo
GENERIC_TIMEZONE=Europe/Berlin
TZ=Europe/Berlin
[email protected]

# Host Configuration
N8N_HOST=${SUBDOMAIN}.${DOMAIN_NAME}
N8N_PORT=5678
N8N_PROTOCOL=https
WEBHOOK_URL=https://${SUBDOMAIN}.${DOMAIN_NAME}/

# PostgreSQL Configuration
POSTGRES_USER=n8n
POSTGRES_PASSWORD=INSERT_SECURE_PASSWORD_HERE
POSTGRES_DB=n8n
Generate a secure database password with the following command:
openssl rand -base64 32
Replace:
wz-it.comwith your domainn8n-demowith your desired subdomain[email protected]with your e-mail address for Let's Encrypt notificationsINSERT_SECURE_PASSWORD_HEREwith the generated database password
The WEBHOOK_URL is particularly important as n8n needs this for the correct functioning of webhooks. Make sure that it points to your actual domain with HTTPS.
Step 6: Set up Caddy as Reverse Proxy
Create the file Caddyfile in the caddy_config directory:
sudo -u n8n nano caddy_config/Caddyfile
Insert the following content:
{
    email [email protected]
}

n8n-demo.wz-it.com {
    reverse_proxy n8n:5678 {
        flush_interval -1
    }
}
Caddy automatically takes care of the SSL certificates via Let's Encrypt and forwards the traffic to the n8n service. The flush_interval -1 setting is important for n8n so that the connection is not interrupted during long workflows.
Replace n8n-demo.wz-it.com with your own domain and [email protected] with your e-mail address.
Step 7: Docker Compose Configuration
Create the docker-compose.yml:
sudo -u n8n nano docker-compose.yml
Insert the following content:
version: "3.7"
services:
  caddy:
    image: caddy:latest
    restart: unless-stopped
    ports:
      - "80:80"
      - "443:443"
    volumes:
      - caddy_data:/data
      - ./caddy_config:/config
      - ./caddy_config/Caddyfile:/etc/caddy/Caddyfile
    depends_on:
      - n8n
    networks:
      - n8n-network

  postgres:
    image: postgres:16
    restart: unless-stopped
    environment:
      - POSTGRES_USER=${POSTGRES_USER}
      - POSTGRES_PASSWORD=${POSTGRES_PASSWORD}
      - POSTGRES_DB=${POSTGRES_DB}
    volumes:
      - postgres_data:/var/lib/postgresql/data
    healthcheck:
      test: ['CMD-SHELL', 'pg_isready -h localhost -U ${POSTGRES_USER} -d ${POSTGRES_DB}']
      interval: 5s
      timeout: 5s
      retries: 10
    networks:
      - n8n-network

  n8n:
    image: docker.n8n.io/n8nio/n8n:latest
    restart: unless-stopped
    environment:
      - N8N_HOST=${SUBDOMAIN}.${DOMAIN_NAME}
      - N8N_PORT=5678
      - N8N_PROTOCOL=https
      - WEBHOOK_URL=https://${SUBDOMAIN}.${DOMAIN_NAME}/
      - GENERIC_TIMEZONE=${GENERIC_TIMEZONE}
      - TZ=${TZ}
      - N8N_ENFORCE_SETTINGS_FILE_PERMISSIONS=true
      - N8N_RUNNERS_ENABLED=true
      - DB_TYPE=postgresdb
      - DB_POSTGRESDB_DATABASE=${POSTGRES_DB}
      - DB_POSTGRESDB_HOST=postgres
      - DB_POSTGRESDB_PORT=5432
      - DB_POSTGRESDB_USER=${POSTGRES_USER}
      - DB_POSTGRESDB_PASSWORD=${POSTGRES_PASSWORD}
    volumes:
      - n8n_data:/home/node/.n8n
      - ./local_files:/files
    depends_on:
      postgres:
        condition: service_healthy
    networks:
      - n8n-network

volumes:
  caddy_data:
  n8n_data:
  postgres_data:

networks:
  n8n-network:
    driver: bridge
This configuration contains:
- postgres container with PostgreSQL 16 for the database
- postgres_data Volume for persistent storage of database data
- n8n_data Volume for encryption keys, logs and source control assets
- local_files Directory for workflows with local files
- caddy_data Volume for SSL certificates and caddy data
- n8n-network for communication between the containers
Step 8: Start n8n
We now start n8n and Caddy with Docker Compose:
sudo -u n8n docker compose up -d
Monitor the logs to ensure that everything is running correctly:
sudo -u n8n docker compose logs -f caddy
sudo -u n8n docker compose logs -f n8n
If everything runs correctly, you should be able to reach n8n via https://n8n-demo.wz-it.com (or your domain).
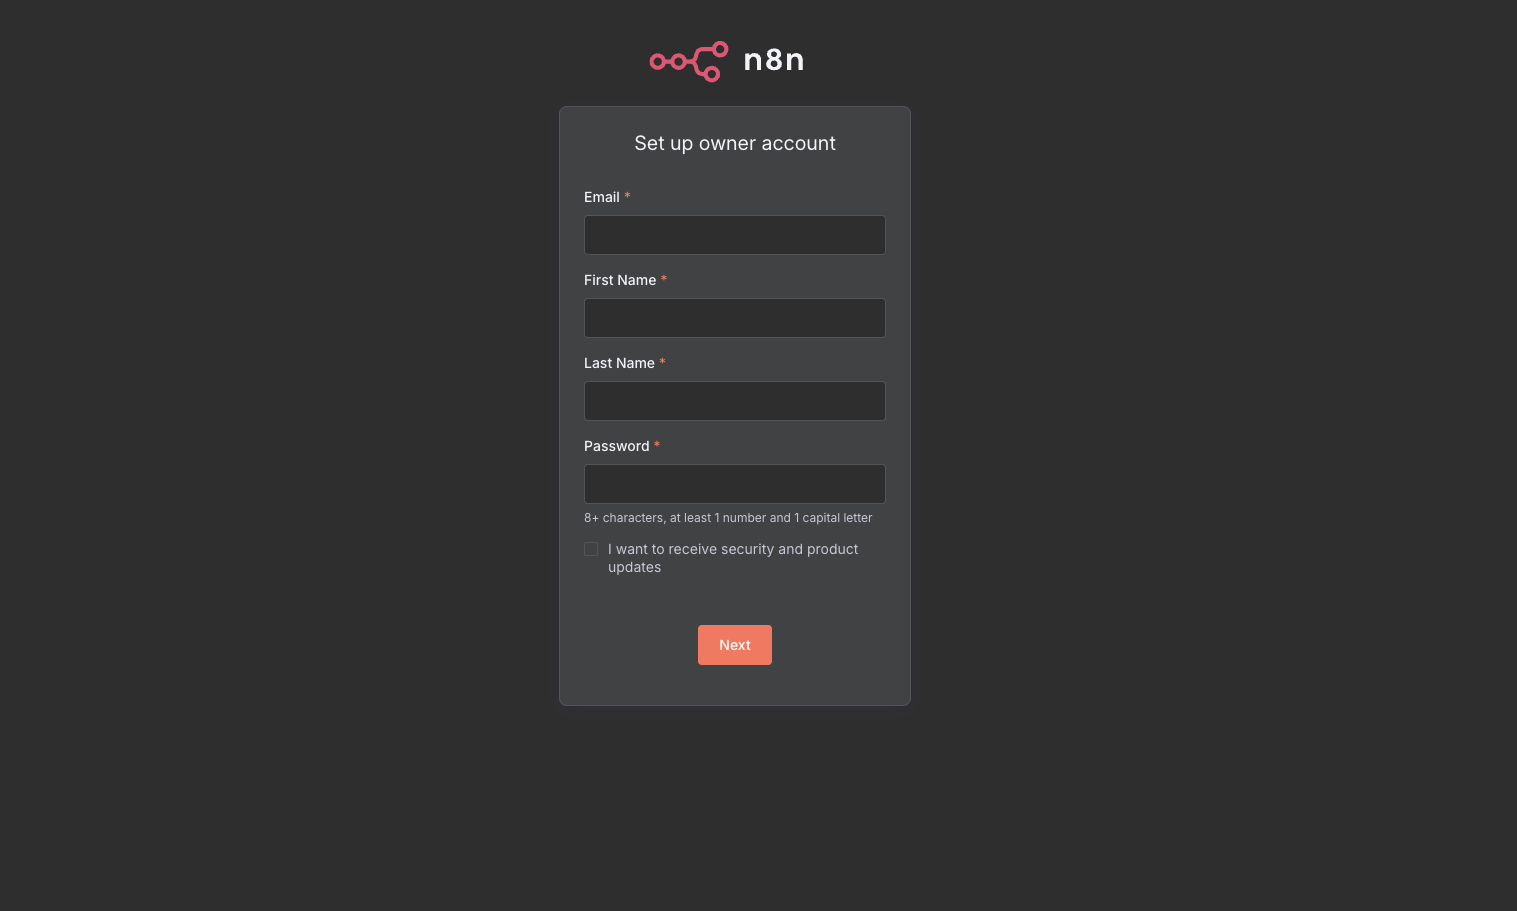
Step 9: Initial Configuration & User Management
The first time you start n8n, you will be asked to create an administrator user. n8n uses a modern user and role management system in which you:
- Create an admin account with e-mail and password
- Create additional users with different roles
- Manage access rights for workflows and credentials
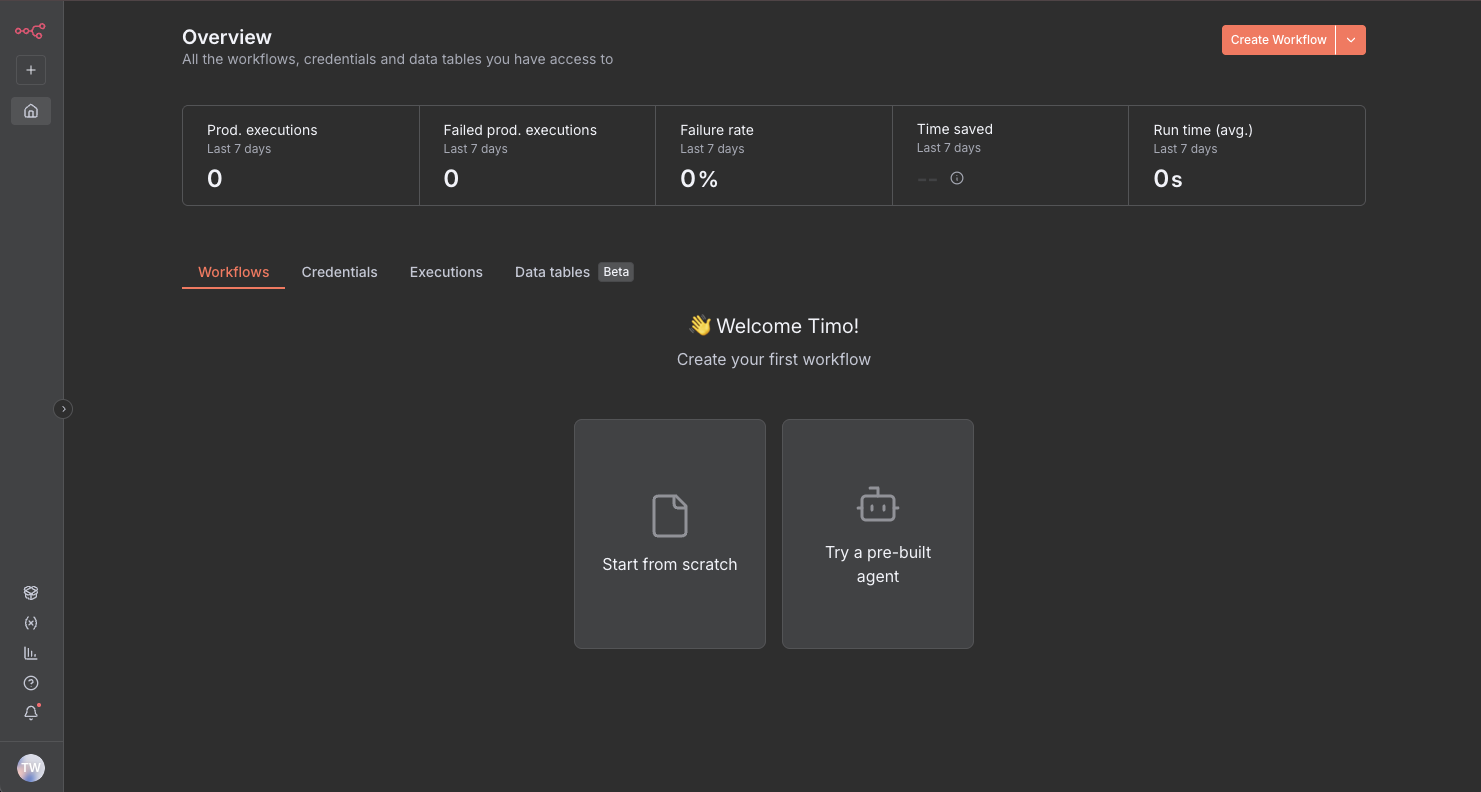
Once set up, you have access to the n8n interface and can start creating your first workflows.
Important notes:
- The WEBHOOK_URL must correctly point to your domain with HTTPS
- You should set up regular backups for productive environments
- Queue mode with Redis is recommended for many workflows
Firewall Configuration
If you have set up a firewall on your server, make sure that ports 80 (HTTP) and 443 (HTTPS) are open. This is necessary so that Caddy can receive requests via HTTP and HTTPS. You can do this with ufw or configure it via the firewall of your cloud provider.
ufw allow 80
ufw allow 443
ufw enable
Backup & Updates
Backup
For regular backups, you should back up both the PostgreSQL database and the n8n_data volume:
PostgreSQL Database Backup:
# Create backup
sudo -u n8n docker compose exec postgres pg_dump -U n8n n8n > /opt/n8n/backups/n8n-db-backup-$(date +%Y%m%d).sql

# Or as a compressed backup
sudo -u n8n docker compose exec postgres pg_dump -U n8n n8n | gzip > /opt/n8n/backups/n8n-db-backup-$(date +%Y%m%d).sql.gz
n8n Data Volume Backup:
sudo -u n8n docker run --rm -v n8n_n8n_data:/data -v /opt/n8n/backups:/backup ubuntu tar czf /backup/n8n-data-backup-$(date +%Y%m%d).tar.gz /data
You can also export workflows and credentials via the n8n UI.
Updates
To update n8n to the latest version, execute the following commands:
cd /opt/n8n
sudo -u n8n docker compose pull
sudo -u n8n docker compose down
sudo -u n8n docker compose up -d
Important: Always create a backup before you carry out updates!
Conclusion
With these instructions you have successfully installed n8n on an Ubuntu 24.04 server with PostgreSQL database and set up an SSL certificate from Let's Encrypt with Caddy. The use of PostgreSQL offers better performance and scalability compared to the standard SQLite installation, especially with higher loads and many simultaneous workflows.
n8n offers a wide range of integrations and can be used as an alternative to commercial workflow automation tools such as Zapier or Make. Further information and full documentation can be found on the official n8n website: https://docs.n8n.io/.
This installation is ready for production. For environments with very high loads, we recommend additional configurations such as:
- Redis for queue mode with multiple workers
- External storage for files (e.g. S3)
- SSO/OIDC integration for companies
- Load balancer for multiple n8n instances
Sources
These instructions are based on the official n8n documentation:
Written by
Timo Wevelsiep
Co-Founder & CEO
Co-Founder of WZ-IT. Specialized in cloud infrastructure, open-source platforms and managed services for SMEs and enterprise clients worldwide.
LinkedInLet's Talk About Your Idea
Whether a specific IT challenge or just an idea – we look forward to the exchange. In a brief conversation, we'll evaluate together if and how your project fits with WZ-IT.
Trusted by leading companies


Timo Wevelsiep & Robin Zins
CEOs of WZ-IT