Explained and set up: Encrypted Proxmox backups with Hetzner Storage Box


Looking for support for your Proxmox environment? WZ-IT takes care of consulting, design, setup, operation, support and monitoring of your infrastructure. Arrange a free appointment now
To protect against data loss, it is important to create regular backups of your Proxmox environment. A cost-effective and secure way to do this is to use a Hetzner Storage Box. In this article, we will show you how to set up a Hetzner Storage Box and create encrypted backups of your Proxmox VMs.
Table of Contents
- What is a Hetzner Storage Box?
- Prepare storage box
- Prepare Proxmox Host
- Configure Proxmox for backups
- Conclusion
What is a Hetzner Storage Box?
The Hetzner Storage Box is a cost-effective storage system that supports a variety of protocols. Its size of 1 TB to 20 TB makes it suitable for a wide range of applications, e.g. as backup storage. We will show you how to set up a Hetzner Storage Box for encrypted Proxmox backups.
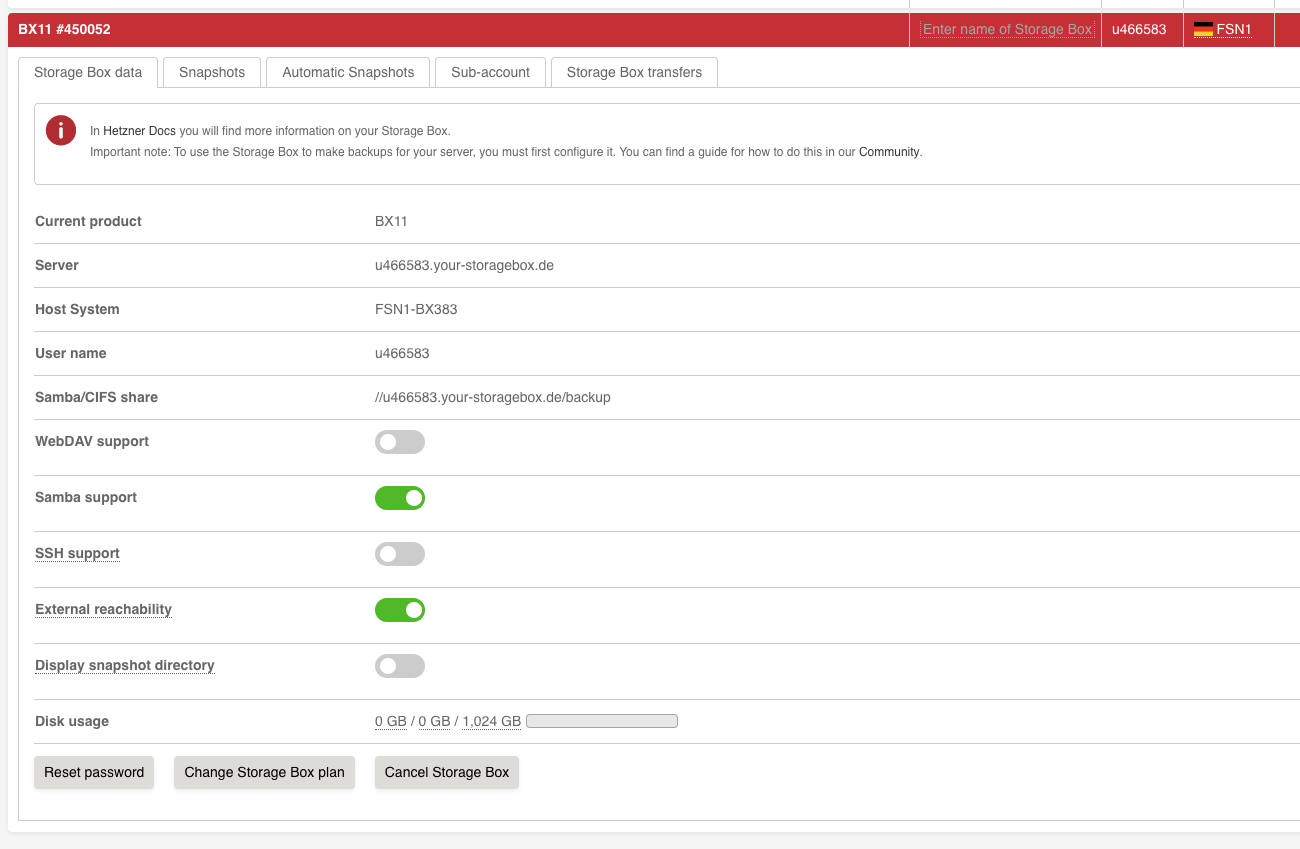
Prepare storage box
Log in to the Hetzner Robot and navigate to the Storage Box you want to use. Activate "Samba support" there and set a password. Make a note of this, as we will need it later.
Prepare Proxmox Host
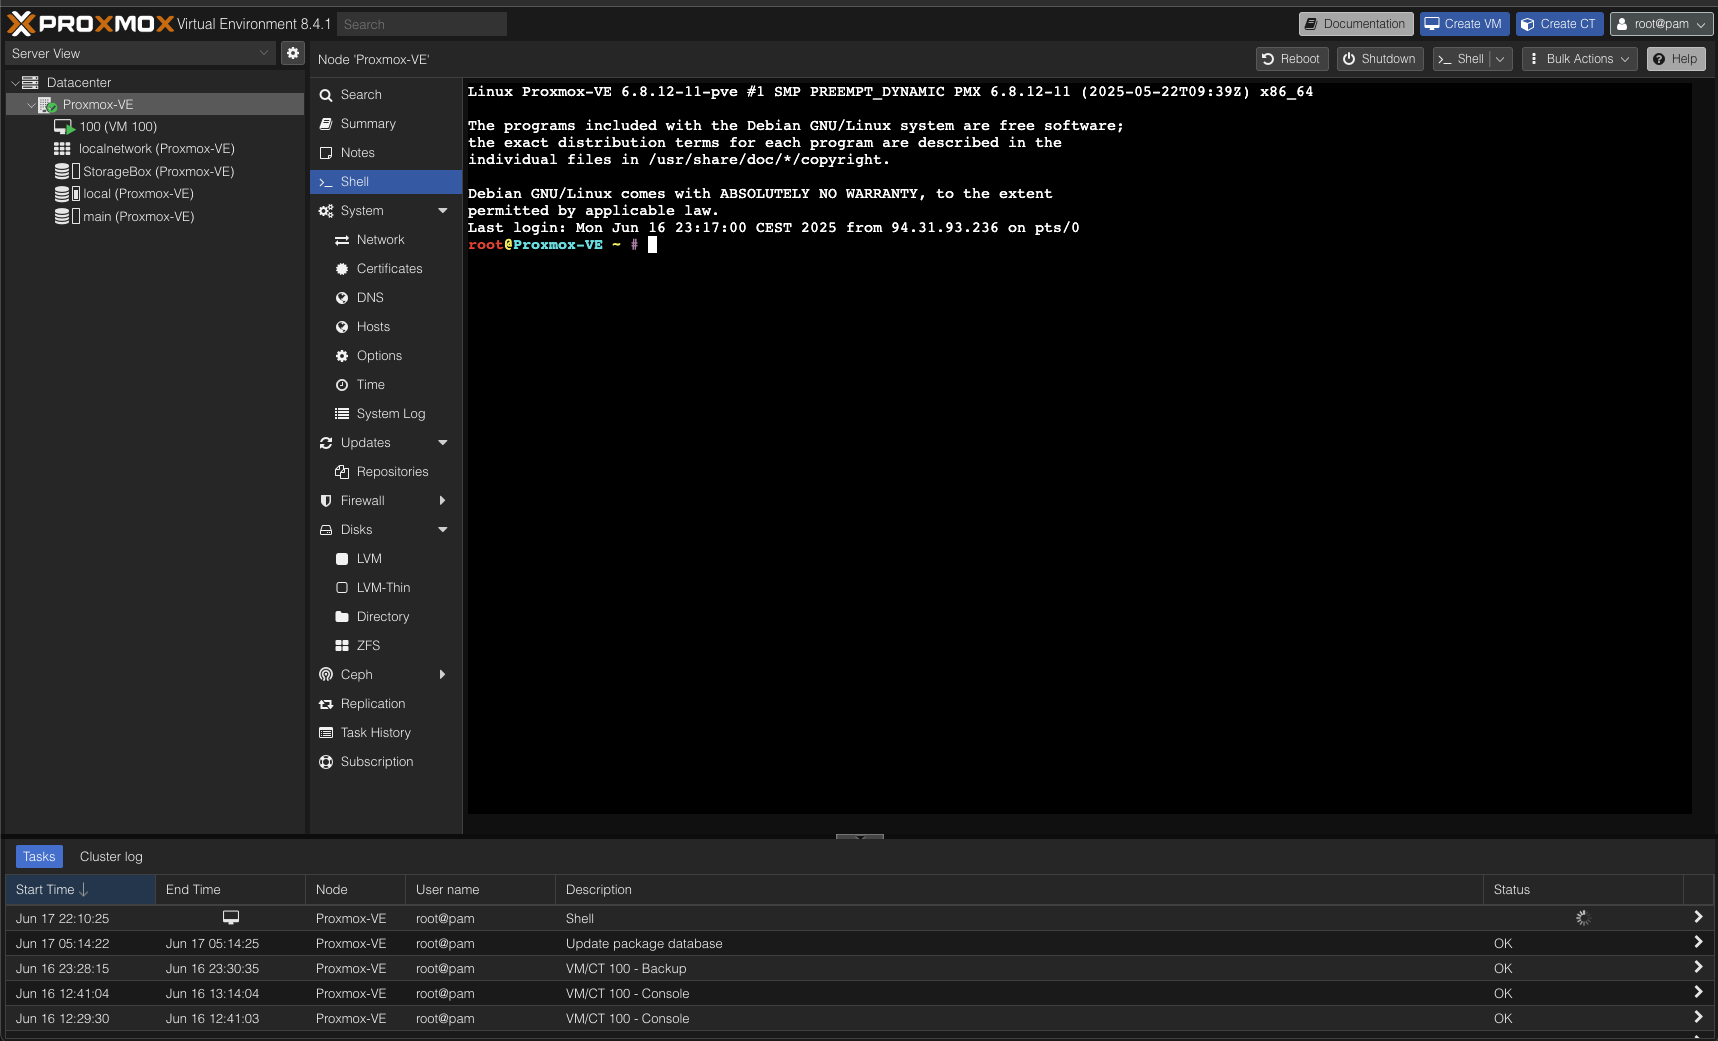
Log in to your Proxmox web interface and open the shell to your Proxmox host via the "Shell" menu or via SSH.
First we install the necessary packages gocryptfs and cifs-utils to integrate the storage box and encrypt the backups:
apt update && apt install gocryptfs cifs-utils -y
We now store our access data for the Storage Box under /root/.smbcredentials. Create the file with the following content:
username=uxxxxxx
password=your_password
Replace uxxxxxx with your user name and your_password with the password that you have set in the Hetzner Robot. Save the file and set the correct permissions:
chmod +600 /root/.smbcredentials
We will now create a directory in which we will integrate the storage box. The encrypted data will also be located in this directory later, which is why we call it storagebox_crypt:
mkdir /mnt/storagebox_crypt
We will now create a mount point in fstab so that the storage box is automatically mounted when booting. Open the file /etc/fstab with a text editor of your choice:
nano /etc/fstab
Add the following line at the end of the file to include the Storage Box:
//uxxxxxx.your-storagebox.de/backup /mnt/storagebox_crypt cifs credentials=/root/.smbcredentials,iocharset=utf8,rw,_netdev,uid=0,gid=0,file_mode=0660,dir_mode=0770 0 0
We now check whether the Storage Box is correctly integrated by executing the following command:
mount -a -vvv
Everything has been set up correctly when we see the message "successfully mounted".

We now initialize the directory for encryption with gocryptfs:
gocryptfs -init /mnt/storagebox_crypt
You will be asked to enter a password for the encryption. This password will be required later to access the encrypted data. Make a good note of this password as it cannot be recovered.
We now prepare the directory for encryption by first creating a directory in which the decrypted data will be stored:
mkdir /mnt/storagebox
We store the password in a file so that we do not have to enter it again later. Create the file /root/.gocryptfs with the following content:
password=your_encryption_password
Replace your_encryption_password with the password you used when initializing gocryptfs. Set the correct permissions for the file:
chmod +600 /root/.gocryptfs
We now add another entry to the file /etc/fstab to automatically include the directory for decryption:
/mnt/storagebox_crypt /mnt/storagebox fuse./usr/bin/gocryptfs rw,nofail,auto,x-systemd.idle-timeout=10,x-systemd.automount,allow_other,quiet,passfile=/root/.gocryptfs 0 0
We now check whether the directory is correctly integrated by executing the following command:
mount -a -vvv
There we should see the message "successfully mounted" if everything is set up correctly.
Configure Proxmox for backups
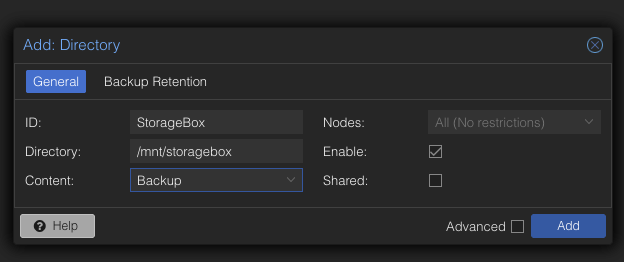
Log in to your Proxmox web interface and navigate to "Datacenter" > "Storage". Click on "Add" and select "Directory".
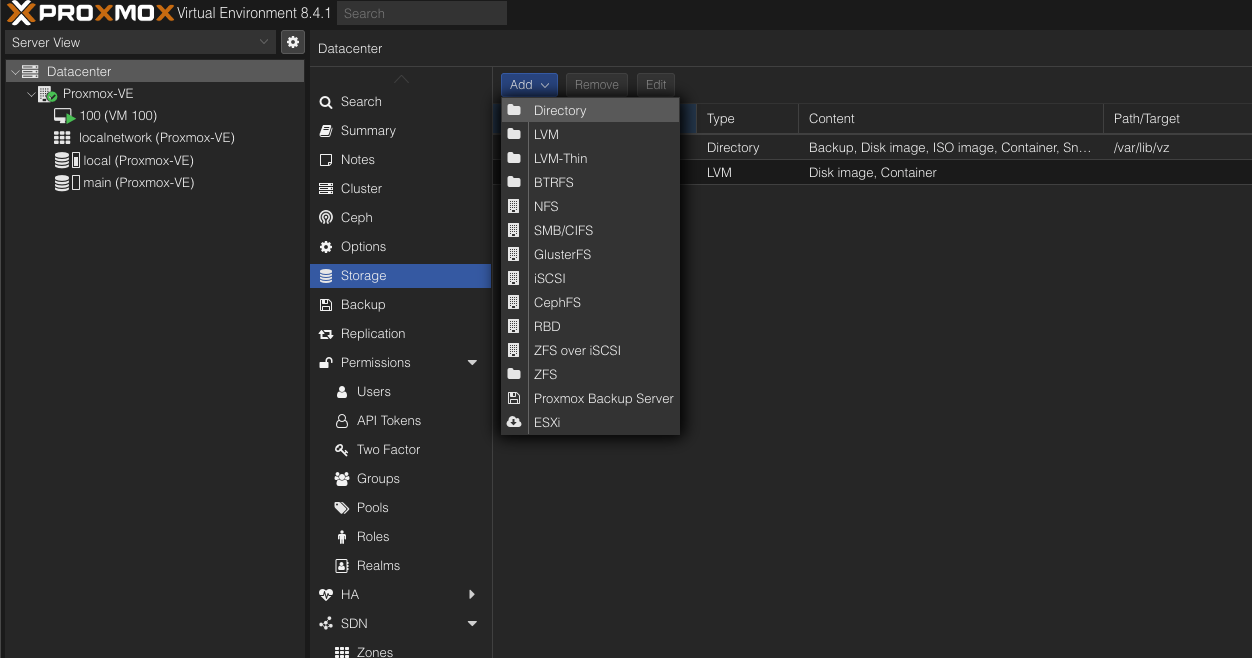
We then set an ID there, in our example simply "StorageBox". We specify /mnt/storagebox as the directory, as this is the directory in which the Storage Box is stored unencrypted. We select "Backup" as the content, as this is where we want to store our backups.
We can now see our new storage in the overview. We can now create backup jobs that access this storage. To do this, we go to "Datacenter" > "Backup" and click on "Add".
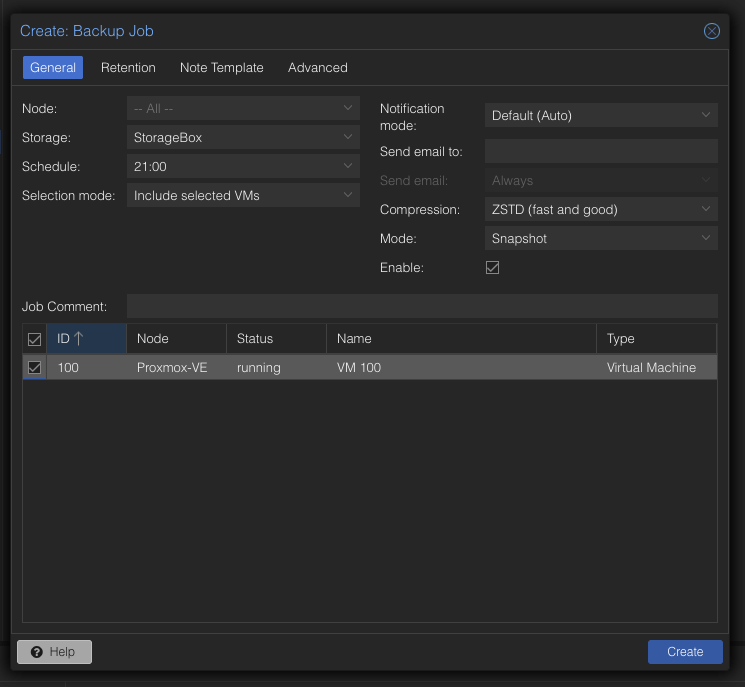
For our example, we have created a VM with the ID 100. Under Schedule, for example, we select "Daily" to create a daily backup. Under Storage, we select our new storage "StorageBox". We can leave the other settings at the default values. It is also important that if it is a database, for example, we select "Stop" for Mode so that we have a consistent database status.
Conclusion
Setting up a Hetzner Storage Box for encrypted Proxmox backups is a cost-effective and secure way to protect your data. With the steps described above, you can quickly and easily set up a Hetzner Storage Box and create encrypted backups of your Proxmox VMs.
Credits go to ApfelCast, who has already described the whole thing on his blog: ApfelCast Blog
Written by
Timo Wevelsiep
Co-Founder & CEO
Co-Founder of WZ-IT. Specialized in cloud infrastructure, open-source platforms and managed services for SMEs and enterprise clients worldwide.
LinkedInLet's Talk About Your Idea
Whether a specific IT challenge or just an idea – we look forward to the exchange. In a brief conversation, we'll evaluate together if and how your project fits with WZ-IT.
Trusted by leading companies


Timo Wevelsiep & Robin Zins
CEOs of WZ-IT