Proxmox on Hetzner in 5 Minutes: ZFS RAID1 Single-Node Setup with Auto-Install Script


Run Proxmox on Hetzner professionally? WZ-IT handles setup, network design, operations and support for your Proxmox infrastructure. To the service page →
This post covers a fast, reproducible installation of Proxmox VE on a Hetzner Dedicated Server as a single node with ZFS Mirror (RAID1) – without a KVM console, by booting the server into the rescue system and letting a script automate the installation. As an example, this guide uses a setup that works well with a Hetzner AX41-NVMe.
What You'll Get
- Freshly installed Proxmox VE (automated via ISO + auto-install)
- Root filesystem on ZFS (Mirror/RAID1)
- Typical Proxmox network setup:
- vmbr0 = Public Bridge (IPv4/IPv6)
- vmbr1 = Private Bridge with NAT/Masquerading (practical for internal networks/LXCs/VMs)
- Proxmox Web GUI accessible at
https://<IP>:8006
Important Notes (Please Read)
- Warning: Data Loss. This installation is intended for fresh installs and will overwrite the system on the disks (typical reinstall behavior).
- This is a third-party script (ariadata/proxmox-hetzner). Read through it before running and only use it if you agree that it modifies system and network files as well as APT sources.
- Hetzner's network configuration is somewhat "special" (routing/gateway requirements). If you change things later, refer to Hetzner guidelines.
Prerequisites
- Hetzner Dedicated Server (Example: AX41-NVMe)
- Access to Hetzner Robot (or Hetzner Cloud Rescue, depending on product)
- SSH Client (Linux/macOS Terminal or Windows PowerShell/WSL)
- Optional: SSH key registered in Robot (more convenient for rescue)
Table of Contents
- Step 1: Activate Rescue System
- Step 2: Start Installation via Script
- Step 3: What the Script Does
- Step 4: Reboot & Login
- Quick Checks After Login
- Sources
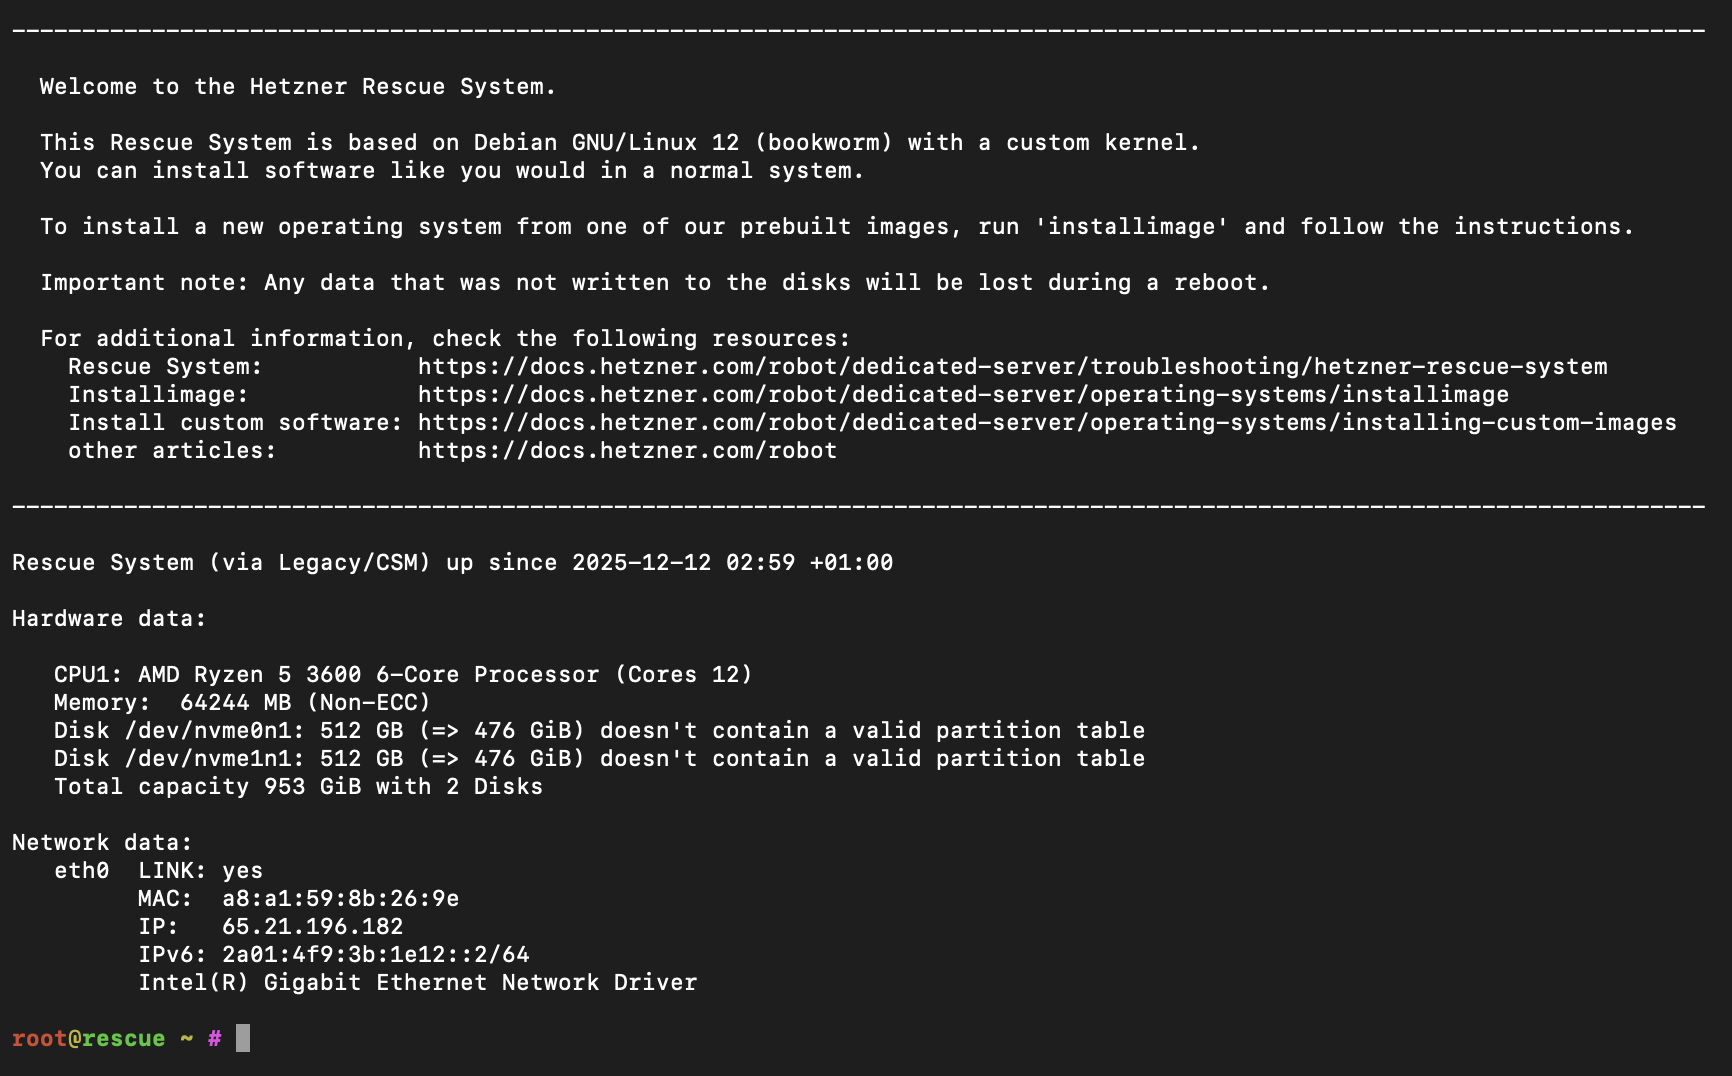
Step 1: Activate Rescue System (Hetzner Robot)
- In Hetzner Robot: Servers → select your server → Rescue
- Select Linux / 64-bit (public key optional) and activate rescue
- Then in the Reset tab, trigger a Hardware Reset
- SSH into the rescue system as
root(password is shown in Robot)
Step 2: Start Installation via Script
In the rescue system as root:
bash <(curl -sSL https://github.com/ariadata/proxmox-hetzner/raw/main/scripts/pve-install.sh)
The project describes the process as an automated installation without console (ISO is downloaded, auto-install configuration is created, ZFS RAID1 is set up, network IPv4/IPv6 is configured, hostname/FQDN etc.).
What the script interactively asks:
- Network interface (e.g.,
eno1) - Hostname & FQDN
- Timezone & email
- Private subnet (for vmbr1/NAT)
- New root password

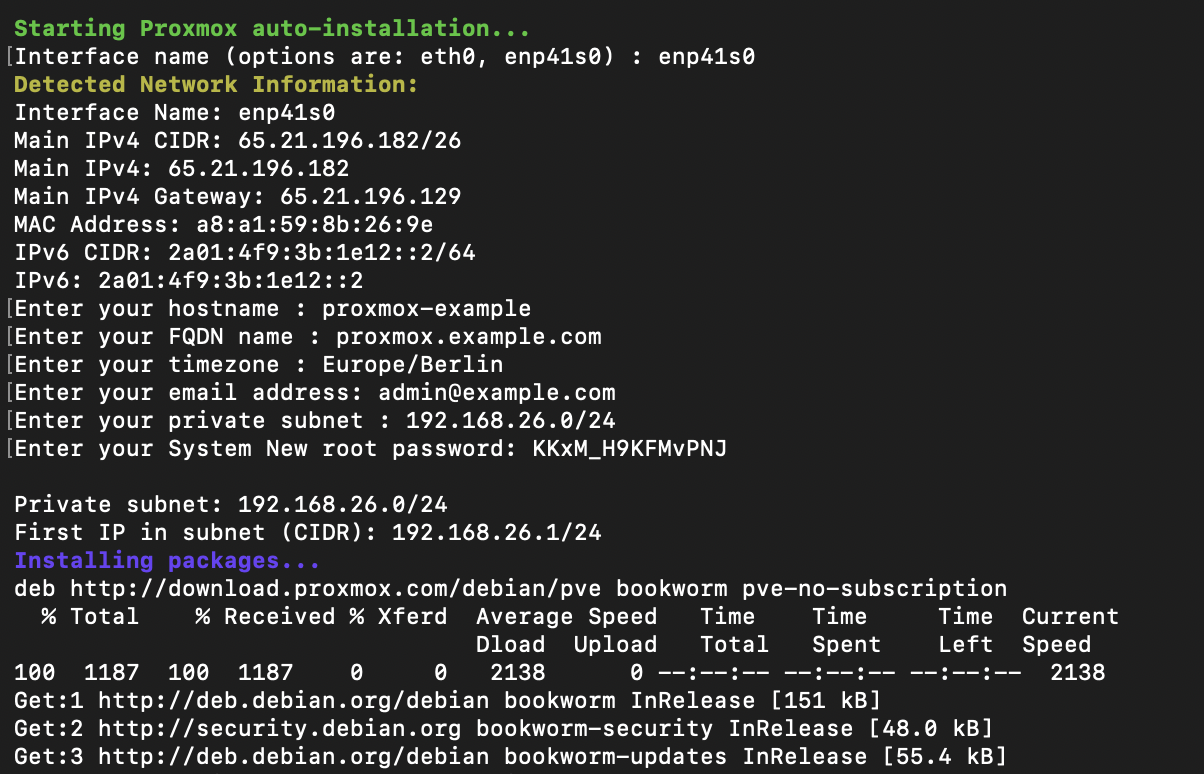
After confirmation, the automatic installation begins:
Step 3: What the Script Does Technically (Brief & Transparent)
So you know what's happening, here are the key components:
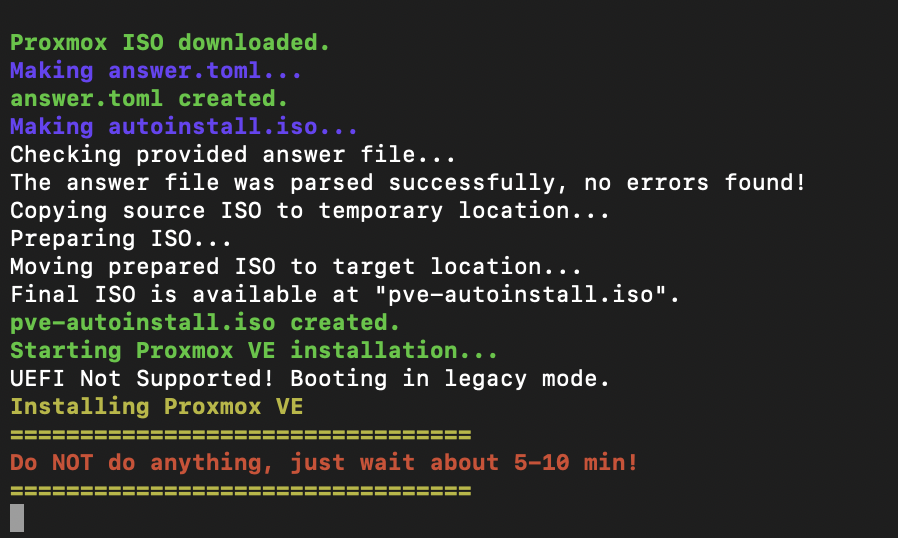
1) Proxmox ISO + Auto-Install
The script downloads a Proxmox VE ISO (automatically "latest") and creates an auto-install ISO via the Proxmox auto-install assistant.
2) ZFS Mirror (RAID1)
The auto-install answer file sets:
filesystem = "zfs"zfs.raid = "raid1"- Installation on two disks (as
vda/vdbin the installer)
Proxmox has supported ZFS as a root option for years (no manual module building required).
3) Installation via QEMU in Rescue
The Proxmox installation is booted in a QEMU VM within the rescue system, installing directly to the server disks (virtually mapped as vda/vdb).
4) Network Setup in Proxmox (vmbr0/vmbr1)
After installation, the script briefly boots the freshly installed environment with SSH port forwarding, copies prepared template files over, and sets up:
/etc/network/interfaceswithvmbr0(Public Bridge, IPv4 + IPv6)vmbr1(Private Bridge) plus NAT/MASQUERADE iptables rules
- IP forwarding via sysctl (
net.ipv4.ip_forward=1,net.ipv6.conf.all.forwarding=1)
This is practical when you want to run VMs/LXCs "internally" first without immediately routing public IPs.
Step 4: Reboot – and Log into Proxmox
After completion, the script asks if it should reboot:

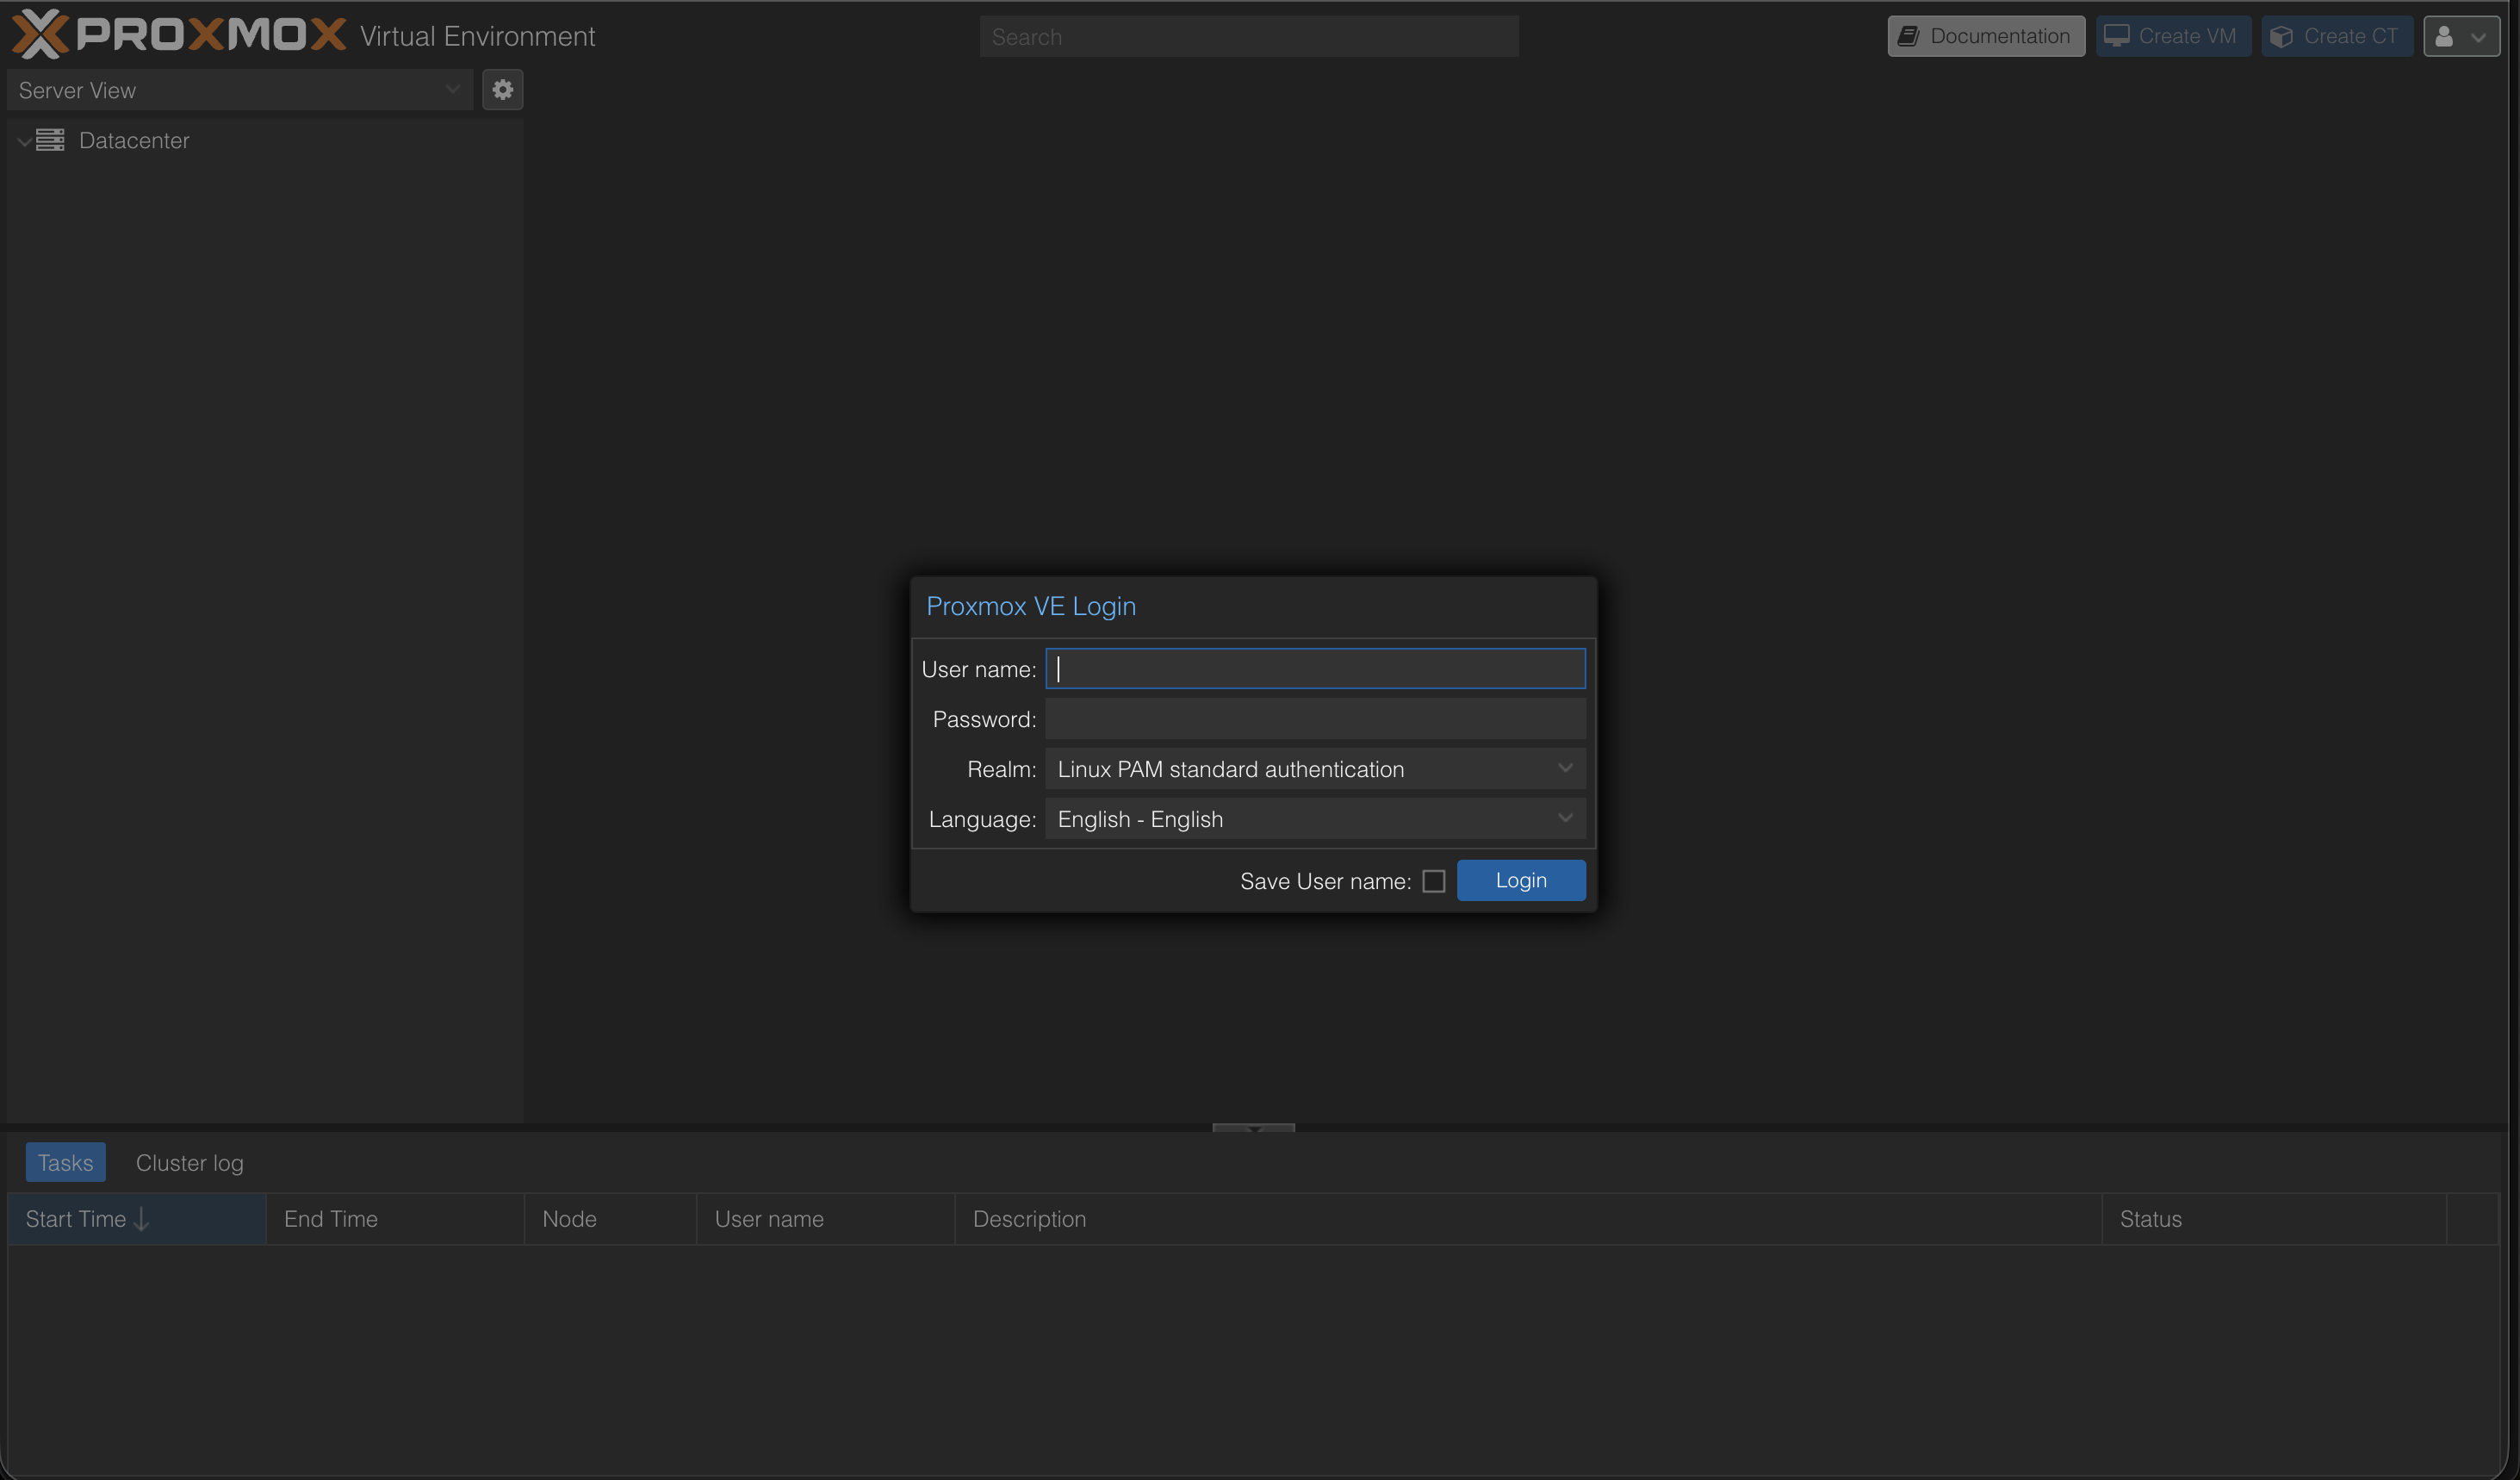
After that, your server boots into the installed Proxmox.
Access the web interface at:
https://<your-server-ip>:8006
Login:
- User:
root - Password: the password you set (in the script/installer)
Quick Checks After Login
1. Check ZFS Pool (Shell on Node)
zpool status
zfs list
You should see a mirror pool (ZFS RAID1). The ZFS root setup is the core of this approach.
2. Check Network Bridges
Datacenter → <Node> → System → Network
You should see vmbr0 and vmbr1 (Public/Private).
Optional: Next Steps
- Update system:
apt update && apt dist-upgrade -y - Update ISO index and load templates
- Remove subscription warning: Tutorial: Remove Proxmox Subscription Notice
- If you want to manually adjust Hetzner-specific network details (additional IPs/subnets/routing): Hetzner Community Tutorials are a good reference.
Sources
- Hetzner Docs: Rescue System
- Hetzner Community: Install Proxmox & Networking
- Proxmox Docs: Web GUI
- Proxmox Wiki: ZFS on Linux
- GitHub: ariadata/proxmox-hetzner
Further Guides
- Proxmox on Hetzner – Managed Service
- Proxmox Overview
- Proxmox Maintenance & Support
- Proxmox Backup Server
- Hetzner Expertise
- Proxmox Cluster Network on Hetzner
Have questions about Proxmox, virtualization, or cluster setups on Hetzner? We support you with installation, operations, and optimization. Schedule a consultation now
Frequently Asked Questions
Answers to important questions about this topic
Via the Hetzner Rescue System over SSH: Activate rescue, restart the server, run an install script – the rest runs automatically.
Yes – that's exactly what this guide is built for (AX41-NVMe as example, single node).
It creates an automated Proxmox installation, sets up ZFS as root filesystem in mirror mode, and configures network/hostname/FQDN.
Yes. The installation overwrites the system disks. Make sure to pull backups beforehand.
A ZFS Mirror equals RAID1: Data is mirrored on two drives. If one SSD fails, the system keeps running.
You get a minimal live system from which you can start the installation completely remote – without a physical console.
Via HTTPS in your browser (port 8006). Login: root + the root password you set.
vmbr0 is the public bridge (public IP), vmbr1 is an internal private bridge network for VMs/containers with NAT.
Yes, if vmbr1 is set up as a private network with NAT. The host does masquerading to the outside.
At minimum: SSH (22) and Proxmox Web (8006). Recommendation: keep as few ports open as possible.
For production it's recommended. For tests/homelab it works without – then use the no-subscription repo.
On the shell: run zpool status. You should see a mirror vdev and both devices as ONLINE.
Yes – for many workloads a single host is sufficient. For high availability you need multiple nodes + quorum setup.
Written by
Timo Wevelsiep
Co-Founder & CEO
Co-Founder of WZ-IT. Specialized in cloud infrastructure, open-source platforms and managed services for SMEs and enterprise clients worldwide.
LinkedInLet's Talk About Your Idea
Whether a specific IT challenge or just an idea – we look forward to the exchange. In a brief conversation, we'll evaluate together if and how your project fits with WZ-IT.
Trusted by leading companies


Timo Wevelsiep & Robin Zins
CEOs of WZ-IT