
Proxmox restore test from €1,490 net - WZ-IT reviews encryption, key access and the backup path, restores an agreed system in isolation and documents the result. View restore test · Have Proxmox Backup Server set up and operated
A Hetzner Storage Box can serve as an offsite target for Proxmox backups: it can be mounted via SMB/CIFS, traffic is unlimited and the location is selectable (Germany or Finland). The service does not encrypt the contents on the client side. This guide mounts the Storage Box on the Proxmox host, adds an encryption layer with gocryptfs and sets up the result as a directory storage for vzdump backups. If you back up with Proxmox Backup Server (PBS), the last section explains how the two approaches differ.
Table of Contents
- What is a Hetzner Storage Box?
- Prepare the Storage Box
- Mount the Storage Box in Proxmox and encrypt it with gocryptfs
- Set up the backup job and test the restore
- gocryptfs or Proxmox Backup Server: Which option fits?
What is a Hetzner Storage Box?
The Hetzner Storage Box is an online storage that Hetzner offers in four sizes: 1 TB (BX11), 5 TB (BX21), 10 TB (BX31) and 20 TB (BX41). Access is available via FTP, FTPS, SFTP, SCP, SMB/CIFS, rsync over SSH, BorgBackup, Restic, Rclone, HTTPS and WebDAV; the location is Germany or Finland (Hetzner Storage Box, Hetzner documentation). Current prices are listed on Hetzner's product page (as of October 2026).
This makes the Storage Box suitable as backup storage outside your own site. If you run Proxmox yourself on a Hetzner server, see Proxmox on Hetzner for installation and networking.
Prepare the Storage Box
Open your Storage Box in Hetzner Console and select the action "Change settings". Enable SMB support there; if the Proxmox host is outside the Hetzner network, also enable "External Reachability" in the same dialog. Set the password of the main user (action "Reset password") and make a note of it, as we will need it later. For the main user the share is called backup, and the address is uXXXXX.your-storagebox.de/backup (Hetzner documentation: access with SMB/CIFS).
Since 29 July 2025, Hetzner manages stand-alone Storage Boxes in Hetzner Console rather than in Robot (Hetzner FAQ). In Console, enable SMB support under "Change settings"; in the Robot interface the option is called "Samba support".
Mount the Storage Box in Proxmox and encrypt it with gocryptfs
Log in to your Proxmox web interface and open the shell to your Proxmox host via the "Shell" menu or via SSH.
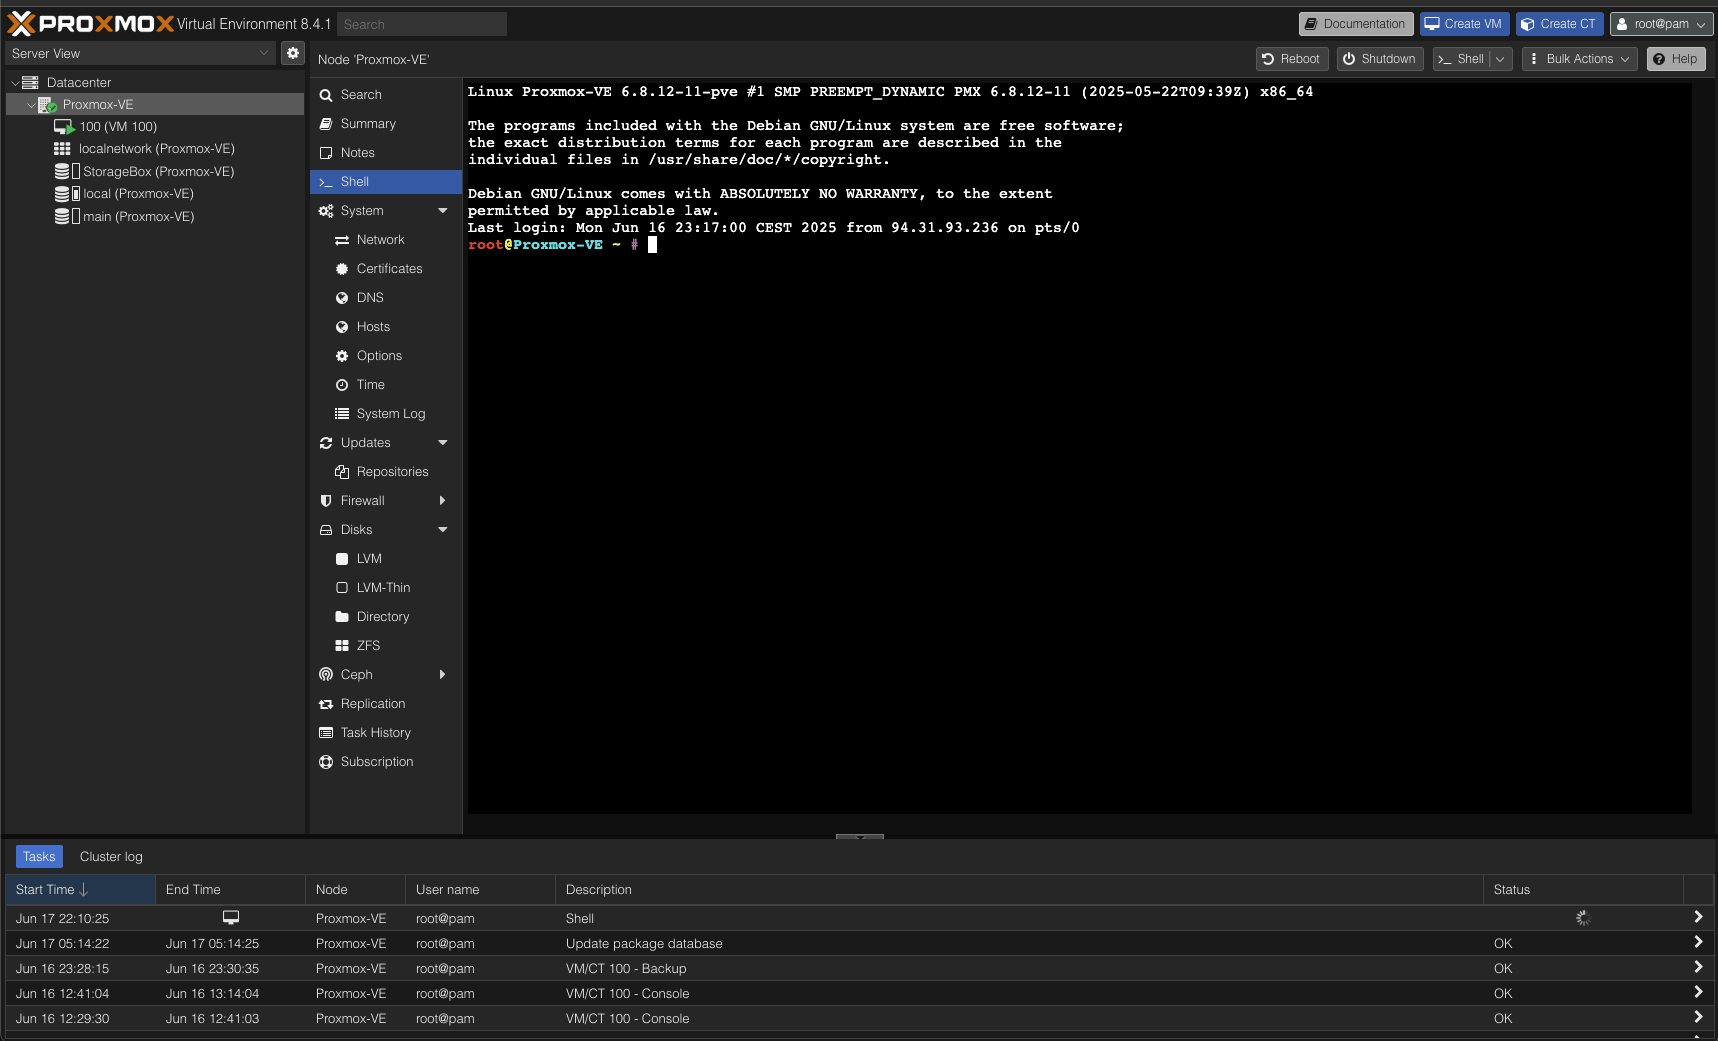
First we install the necessary packages gocryptfs and cifs-utils to integrate the Storage Box and encrypt the backups:
apt update && apt install gocryptfs cifs-utils -y
We now store our access data for the Storage Box under /root/.smbcredentials. Create the file with the following content:
username=uxxxxxx
password=your_password
Replace uxxxxxx with your user name and your_password with the password that you have set in Hetzner Console. Save the file and set the permissions so that only root can read it:
chmod 600 /root/.smbcredentials
We will now create a directory in which we will mount the Storage Box. The encrypted data will also be located in this directory later, which is why we call it storagebox_crypt:
mkdir /mnt/storagebox_crypt
We will now create a mount point in fstab so that the Storage Box is automatically mounted when booting. Open the file /etc/fstab with a text editor of your choice:
nano /etc/fstab
Add the following line at the end of the file to include the Storage Box:
//uxxxxxx.your-storagebox.de/backup /mnt/storagebox_crypt cifs credentials=/root/.smbcredentials,iocharset=utf8,rw,seal,_netdev,uid=0,gid=0,file_mode=0660,dir_mode=0770 0 0
Hetzner points out that SMB connections are not necessarily encrypted automatically. The seal option encrypts the SMB connection itself (Hetzner documentation); gocryptfs additionally protects the contents in the next step.
We now check whether the Storage Box is correctly mounted by executing the following command:
mount -a -vvv
Everything has been set up correctly when we see the message "successfully mounted".

We now initialize the directory for encryption with gocryptfs. gocryptfs -init requires an empty directory (gocryptfs man page):
gocryptfs -init /mnt/storagebox_crypt
You will be asked to enter a password for the encryption. This password will be required later to access the encrypted data. Make a good note of this password as it cannot be recovered.
After you enter the password, gocryptfs prints the master key once. With it, the data stays accessible if the password is lost or the config file is damaged (gocryptfs README). Store the password and the master key separately from the Storage Box, for example in a password manager.
The config file gocryptfs.conf is stored in the encryption directory by default, here at /mnt/storagebox_crypt/gocryptfs.conf and therefore on the Storage Box itself. Without it, the data can only be decrypted with the master key. Keep a copy somewhere else:
cp /mnt/storagebox_crypt/gocryptfs.conf /root/gocryptfs.conf.backup
We now prepare the directory for encryption by first creating a directory in which the decrypted data will be stored:
mkdir /mnt/storagebox
We store the password in a file so that we do not have to enter it again later. Create the file /root/.gocryptfs. It contains only the password, on a single line, without a keyword in front (gocryptfs man page, option -passfile):
your_encryption_password
Replace your_encryption_password with the password you used when initializing gocryptfs. Set the permissions for the file:
chmod 600 /root/.gocryptfs
We now add another entry to the file /etc/fstab to automatically mount the directory for decryption. which gocryptfs shows the path to gocryptfs:
/mnt/storagebox_crypt /mnt/storagebox fuse./usr/bin/gocryptfs rw,nofail,auto,x-systemd.idle-timeout=10,x-systemd.automount,allow_other,quiet,passfile=/root/.gocryptfs 0 0
We now check whether the directory is correctly mounted by executing the following command:
mount -a -vvv
There we should see the message "successfully mounted" if everything is set up correctly.
Set up the backup job and test the restore
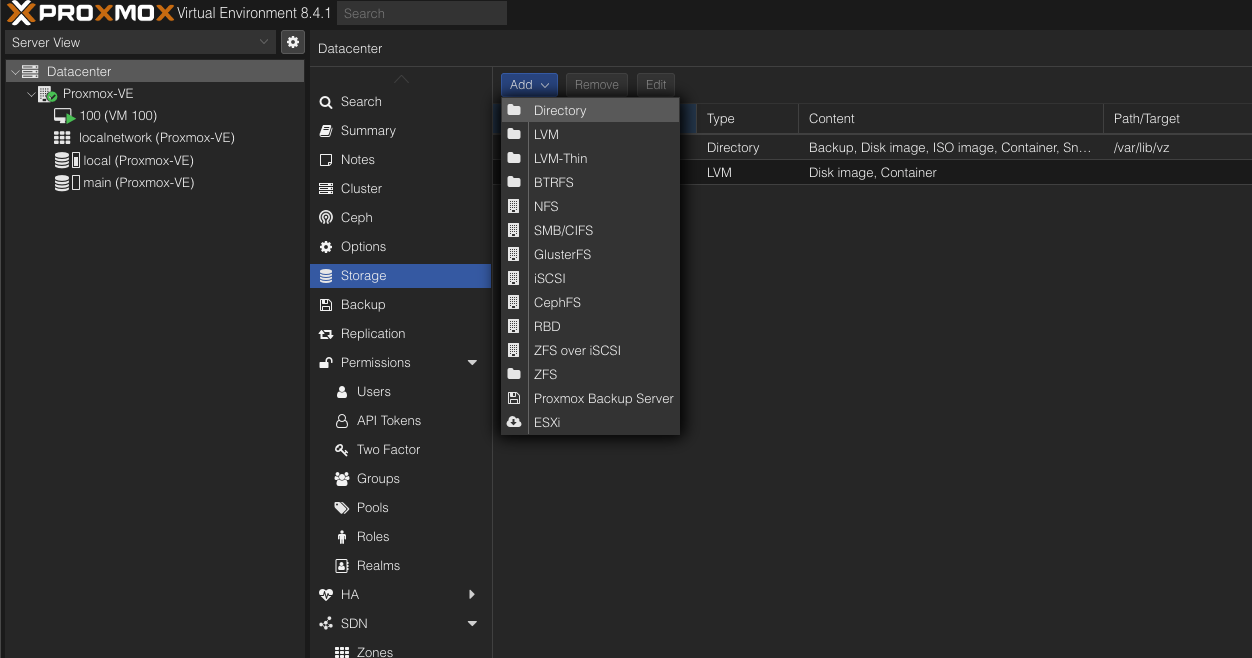
Log in to your Proxmox web interface and navigate to "Datacenter" > "Storage". Click on "Add" and select "Directory".
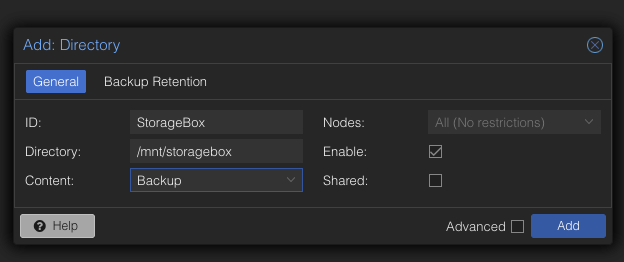
We then set an ID there, in our example simply "StorageBox". We specify /mnt/storagebox as the directory, as this is the directory in which the Storage Box is available unencrypted. We select "Backup" as the content, as this is where we want to store our backups.
We can now see our new storage in the overview. We can now create backup jobs that access this storage. To do this, we go to "Datacenter" > "Backup" and click on "Add".
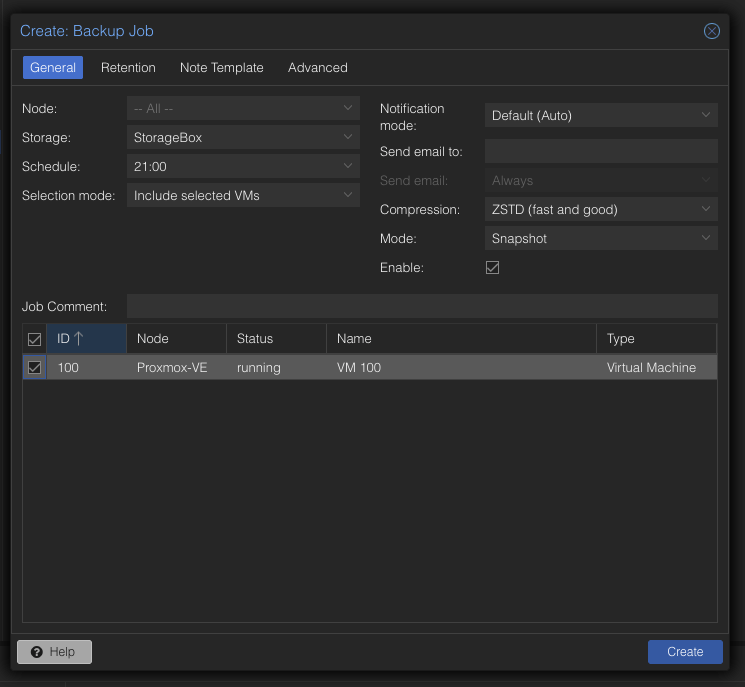
For our example, we have created a VM with the ID 100. Under Schedule, for example, we select "Daily" to create a daily backup. Under Storage, we select our new storage "StorageBox". We can leave the other settings at the default values. It is also important that if it is a database, for example, we select "Stop" for Mode so that we have a consistent database status.
A backup is only proven once a restore from it works. Proxmox stores the backup files of a directory storage in the dump/ subfolder, here under /mnt/storagebox/dump/ (Proxmox documentation: Directory Backend). To test the restore:
- Check that
/mnt/storageboxis mounted and the backup files are visible:ls /mnt/storagebox/dump/. - Restore a backup under a free VM ID so that the production VM stays untouched. In the web interface: storage "StorageBox" > "Backups" > select a backup > "Restore". On the command line:
qmrestore /mnt/storagebox/dump/<archive> <free-vmid> --unique 1(for containerspct restore). The--uniqueoption assigns new MAC addresses (Proxmox documentation: Restore, qmrestore). - Start the restored VM only in an isolated network or without a network connection and check that it boots and the data is present.
- Check the key path: on a second host, the Storage Box,
gocryptfs.confand the password (or the master key) must be enough to read the backups.
The separate guide encrypting Proxmox backups with PBS covers native PBS encryption and key management.
gocryptfs or Proxmox Backup Server: Which option fits?
This guide backs up vzdump archives to a directory storage. Proxmox Backup Server (PBS) is the second way to move Proxmox backups offsite in encrypted form. The differences:
| vzdump + gocryptfs (this guide) | Proxmox Backup Server | |
|---|---|---|
| Encryption | gocryptfs on the Proxmox host, target is a mounted share | Client-side with AES-256-GCM, not enabled by default, key in the storage configuration (PBS documentation) |
| Backup format | vzdump archives, Proxmox VE always creates full backups (Proxmox documentation) | Chunk-based datastore, incremental transfer and deduplication (PBS FAQ) |
| Verification and retention | Retention via prune-backups in the backup job, restore test by hand (see above) | Verify jobs, prune jobs and garbage collection in PBS |
| Hetzner Storage Box as target | Usable directly via CIFS | Not recommended as a datastore, local storage or S3 is better |
For a few VMs and an offsite target without a server of your own, vzdump with gocryptfs is sufficient. Once you need several generations, deduplication, verify jobs or fast restores, PBS is the better choice. For the datastore, the PBS documentation recommends fast local storage with high IOPS (PBS system requirements); a Storage Box mounted via CIFS does not meet that. For offsite copies, a second PBS with a sync job or, since PBS 4.2, an S3-compatible datastore are the better routes. Details are in Proxmox Backup Server Offsite: Pull Architecture and Asymmetric Retention, What is Proxmox Backup Server? and the blog article Proxmox Backup Server 4.2: S3 Storage. WZ-IT handles setup and operation of a PBS under Proxmox Backup Server setup and operations.
ApfelCast also describes the method with Storage Box, CIFS and gocryptfs on his blog, which this guide builds on: ApfelCast Blog.
Next step
Have restore and key access verified
A set-up backup is proven once a restore has succeeded. The WZ-IT restore test checks encryption, key access and the backup path of your environment and restores an agreed system in isolation; the result is documented.
Read next: VMware to Proxmox migration · Proxmox Backup Server 4.2: S3 Storage · Private cloud for SMEs
WZ-IT provides PBS setup and operations, including the agreed offsite design and key paths. A restore test checks recovery.