
Planning to move from VMware to Proxmox, but the target design, risks and project scope are still unclear? The Virtualisation Exit Check provides an inventory, Proxmox target design, migration waves and a reliable implementation framework at a fixed price from €1,490 net. VMware migration by WZ-IT · Explore the exit check · Book an initial consultation
Many organizations are currently evaluating the switch from VMware vSphere (ESXi/vCenter) to the open-source virtualization platform Proxmox Virtual Environment (PVE). The reasons are manifold: changed licensing models, rising costs, and the desire for more control over their own IT infrastructure.
This guide first walks through the migration with the import wizard, then through adapting Windows and Linux VMs after the import and the manual route via VMDK or OVF files. The background on licensing and platform differences follows at the end; costs in detail are explained in How much does Proxmox cost?.
Before implementation: compare VMware alternatives, plan the exit strategy and business case and assess migration readiness with the checklist.
Table of Contents
- Step-by-Step: Migrating VMware VMs with the Import Wizard
- Reference: AWS to Proxmox on Hetzner
- After the Import: Adapting Windows and Linux VMs
- Manual Migration: VMDK and OVF Import as an Alternative
- Background: Why Switch and What Is Different
- Conclusion
- References
Step-by-Step: Migrating VMware VMs with the Import Wizard
The Import Wizard was released on 27 March 2024, already for Proxmox VE 8.1. The vendor announcement specifies pve-manager version 8.1-8 and libpve-storage-perl version 8.1.3 or newer; updating pulls in the pve-esxi-import-tools package (Proxmox announcement, as of October 2026). This tool allows you to connect to a VMware ESXi host or vCenter Server and transfer VMs largely automatically. The wizard originated during the VE 8.2 development cycle and is documented as a tech preview; the vendor announcement lists ESXi 6.5 through 8.0 as supported source versions (Proxmox documentation: Import Wizard).
Preparing the VMware Migration
Check before migration:
- Do VMs use special VMware features (snapshots, dedicated backup agents, vSphere integrations)?
- How will these be mapped in Proxmox?
Find equivalent solutions:
- Proxmox Backup replaces common VM backup tools
- ZFS or Ceph can replace SAN/vSAN
Run test migration:
- Test first with non-critical VMs or in a lab environment
- Refine the process before migrating production systems
1. Update Proxmox
Ensure your Proxmox VE installation is up to date (at least pve-manager 8.1-8 and libpve-storage-perl 8.1.3 are required):
apt update && apt full-upgrade
2. Connect to VMware
- In Proxmox VE, go to: Datacenter → Storage → Add
- Select type "ESXi"
- Configure the connection:
- ID: Choose a name for the connection
- Server: IP address or hostname of the ESXi host or vCenter (importing directly from the ESXi host is much faster: via vCenter the import is 5 to 10 times slower according to the Proxmox documentation)
- Username/Password: Valid VMware credentials
- Optional: Enable Skip Certificate Verification
3. Select VMs
After successful connection, the VMware host appears as a new storage entry:
- Click on the ESXi storage entry under Datacenter/Storage
- All VMs on the ESXi host are listed
- Select the VM to migrate
4. Start Import
Preparing the guest (per the Proxmox wiki):
- Remove the guest tools of the old hypervisor (VMware Tools) before the migration; afterwards it is harder.
- Note down the guest's network configuration so you can restore it after the import. On Windows, consider removing an existing static IP configuration beforehand; for DHCP reservations, enter the new MAC address or set the MAC on the VM network card manually.
- If the keys of a full-disk encryption are stored in a virtual TPM, keep the recovery keys at hand: the vTPM state cannot be migrated from VMware to Proxmox.
- Encrypted VM disks (for example via a storage policy) cannot be imported; remove the encryption first. Snapshots slow the import down significantly.
Run the import:
- Select the desired VM and click Import
- Choose the Proxmox target storage for VM data
- Important: The VM must be powered off on VMware. Optionally, live-import shortens downtime: the VM starts on Proxmox while the data is still being copied (Proxmox wiki)
The import process:
- Reads the VM from VMware
- Copies virtual disks and configuration to the Proxmox host
- The original VM on VMware remains unchanged (copy, not move)
5. Verify and Start VM on Proxmox
After import:
- Check settings - BIOS type, bus type of the boot disk, network card, especially for Windows VMs
- Install VirtIO drivers for optimal performance (Windows guests)
- Start the VM and test functionality
- Install QEMU Guest Agent for optimal integration
What to adapt on Windows and Linux guests in detail is covered in the section After the Import.
6. Migrate Incrementally
Recommended approach:
- Migrate VM by VM, not the entire environment at once
- Plan for brief downtime per VM (shutdown on VMware, startup on Proxmox)
- Move VMs on vSAN to supported storage first (NFS, local VMFS)
- Run imports one after another, not in parallel: the Proxmox wiki recommends importing no more than four VM disks at the same time, because the ESXi host's API allows only few connections and the read cache uses memory.
This guide does not cover wave and target-design planning for more than a handful of VMs. For that there is the virtualisation exit check with inventory, Proxmox target design and migration waves.
Reference: AWS to Proxmox on Hetzner (EVA Real Estate)
This example comes from an AWS migration rather than a VMware import. The target architecture approach is the same: dedicated Hetzner servers with Proxmox to run the applications.
The migration of EVA Real Estate, a real estate agency in Dubai, involved moving from AWS to Proxmox. The company ran their entire CRM and ERP infrastructure on AWS and struggled with:
- Unpredictable costs with hidden fees
- Data outside Europe (GDPR concerns)
- Vendor lock-in that made migration difficult
The Solution: We migrated EVA's complete infrastructure via Lift & Shift to dedicated Hetzner servers with Proxmox - without any code changes.
The Result:
| Metric | Before (AWS) | After (Proxmox/Hetzner) |
|---|---|---|
| Monthly Costs | $1,300 | $250 |
| Cost Reduction | - | 81% |
| Annual Savings | - | $12,600 |
| Data Location | Outside EU | 100% Germany |
The migration paid for itself within 4 months. Additionally, EVA Real Estate had approximately double the computing resources available after the migration - at no extra cost.
More details in our EVA Real Estate Case Study.
After the Import: Adapting Windows and Linux VMs
The import transfers disks and a large part of the configuration. What is different on Proxmox remains work on the guest; the Proxmox wiki names two points: updating network settings and installing missing drivers (Proxmox wiki: Post Migration).
Check Boot Mode and Hardware
The BIOS type must match the source system: if the VM boots in legacy BIOS mode, it belongs on SeaBIOS; if it boots via UEFI, on OVMF (UEFI) with an EFI disk (Proxmox wiki: BIOS / UEFI). As the target configuration, the wiki recommends VirtIO for network and disks (SCSI controller VirtIO SCSI single), the ballooning device enabled and the QEMU Guest Agent (Proxmox wiki: Best practices).
SCSI Controller and VirtIO Drivers (Windows)
Windows does not ship VirtIO drivers. If the boot disk is attached to VirtIO SCSI without the driver installed, the VM does not boot; without additional drivers, only IDE and SATA work. The Proxmox wiki describes switching the boot disk to VirtIO SCSI as a separate step (Proxmox wiki: VirtIO Guest Drivers). The switch proceeds in stages: first attach the boot disk to SATA, mount the virtio-win ISO and install the drivers, then switch the boot disk to VirtIO SCSI. The individual steps, including the INACCESSIBLE_BOOT_DEVICE blue screen, are in Step 5 of the guide Migrate Hyper-V to Proxmox; switching the boot disk's driver is the same task regardless of the source hypervisor.
QEMU Guest Agent and VMware Tools
VMware Tools have their counterpart in the QEMU Guest Agent on Proxmox. Per the wiki's recommendation, the VMware Tools are removed before the migration (see Step 4). You install the Guest Agent in the guest and enable it in the VM options, for example with qm set <vmid> --agent 1.
Network Interfaces
The virtual network card appears in the guest as a new device with a new MAC address, and the adapter name usually changes; the saved network configuration therefore has to be restored manually on the new adapter. On Windows, the system shows a warning if the same static IP is assigned to the new adapter although the old one is no longer present. You set VLAN tags in Proxmox on the bridge or directly on the VM network card (see the component comparison).
Linux VMs
Linux guests usually need no additional drivers but should have the VirtIO drivers in the initramfs. If a migrated VM does not boot because the driver for VirtIO SCSI is missing, the bootloader's rescue entry or temporarily IDE or SATA as the bus type helps (Proxmox wiki). Notes on /etc/fstab, bootloader and initramfs are in the guide Migrate Hyper-V to Proxmox.
Licensing and Activation (Windows Server)
Windows Server licensing on Proxmox and activation without AVMA are explained in Licensing and Activating Windows Server on Proxmox.
Manual Migration: VMDK and OVF Import as an Alternative
If a VM is available as an OVF export or VMDK file, the manual routes from the Proxmox wiki are an option. For large disks, a more involved route can be worth it because it can shorten downtime (Proxmox wiki: Manual Migration).
Export and Import OVF
The export is done by VMware's ovftool (Linux 64-bit version, matching the ESXi version):
./ovftool vi://root@<ESXi-host>/<VM-name> /path/to/export
On the Proxmox host, qm importovf creates the VM from the OVF file; the VM ID must be free, and any storage with the content type "Disk Image" works as the target:
qm importovf <vmid> <VM-name>.ovf <target-storage>
For file-based storages, --format sets the format (raw, vmdk or qcow2; qcow2 is native). Afterwards you finish the configuration: add a network card, set the CPU type and SCSI controller, for example with qm set <vmid> --cpu x86-64-v2-AES --scsihw virtio-scsi-single. OVF files mostly lack the controller information, and the default is not bootable with OVMF (UEFI); the Proxmox documentation therefore advises VirtIO SCSI or VMware PVSCSI (Proxmox documentation: OVA/OVF Import). For Windows guests without installed VirtIO drivers, the boot disk is initially attached to IDE or SATA.
Import a VMDK File Directly
If *.vmdk and *-flat.vmdk are on a share the Proxmox host can reach, create a new VM without the default disk and import the disk:
qm disk import <vmid> <file>.vmdk <target-storage>
qm disk import converts the image to the target format in the process. The disk then appears as an "Unused Disk" in the hardware view; attach it to a bus (for Windows IDE or SATA) and enable it for the boot disk under Options > Boot Order.
Other Routes
The wiki also describes restoring from a backup, cloning directly with tools such as Clonezilla and "Attach Disk & Move Disk" for minimal downtime, where the VMDK first runs from a shared location and is moved to the target storage while the VM is running.
Background: Why Switch and What Is Different
The detailed comparison including cost implications is in Proxmox vs VMware: Comparison; what follows are the points relevant to the migration.
Changed Licensing Policy After the Broadcom Acquisition
A major driver for the switch is VMware's changed licensing model following the acquisition by Broadcom. The free ESXi Free Edition was discontinued in early 2024, and VMware has shifted its offering to subscription license packages. With ESXi 8.0 Update 3e, Broadcom again offers a free vSphere Hypervisor 8, but explicitly for non-production use only, without support, without vCenter connectivity and with a maximum of 8 vCPUs per VM (Broadcom release notes).
For smaller businesses this means: VMware no longer offers a free hypervisor for production use. Licensing costs and contract terms therefore belong in the assessment of alternatives.
Proxmox as a Cost-Effective Alternative
Proxmox VE differs in its licensing and support model:
- Open source and free to use - without functional limitations in the free version
- Optional support subscriptions for organizations that want professional support
- No vendor lock-in - avoid dependency on a single manufacturer
Technical Advantages of Proxmox
Proxmox includes the following features:
- Clustering and High Availability (HA) already integrated
- Live migration of VMs between hosts at no additional licensing cost
- Integrated backup solutions - procedures and recovery need separate planning when replacing existing backup tools
Proxmox VE Overview
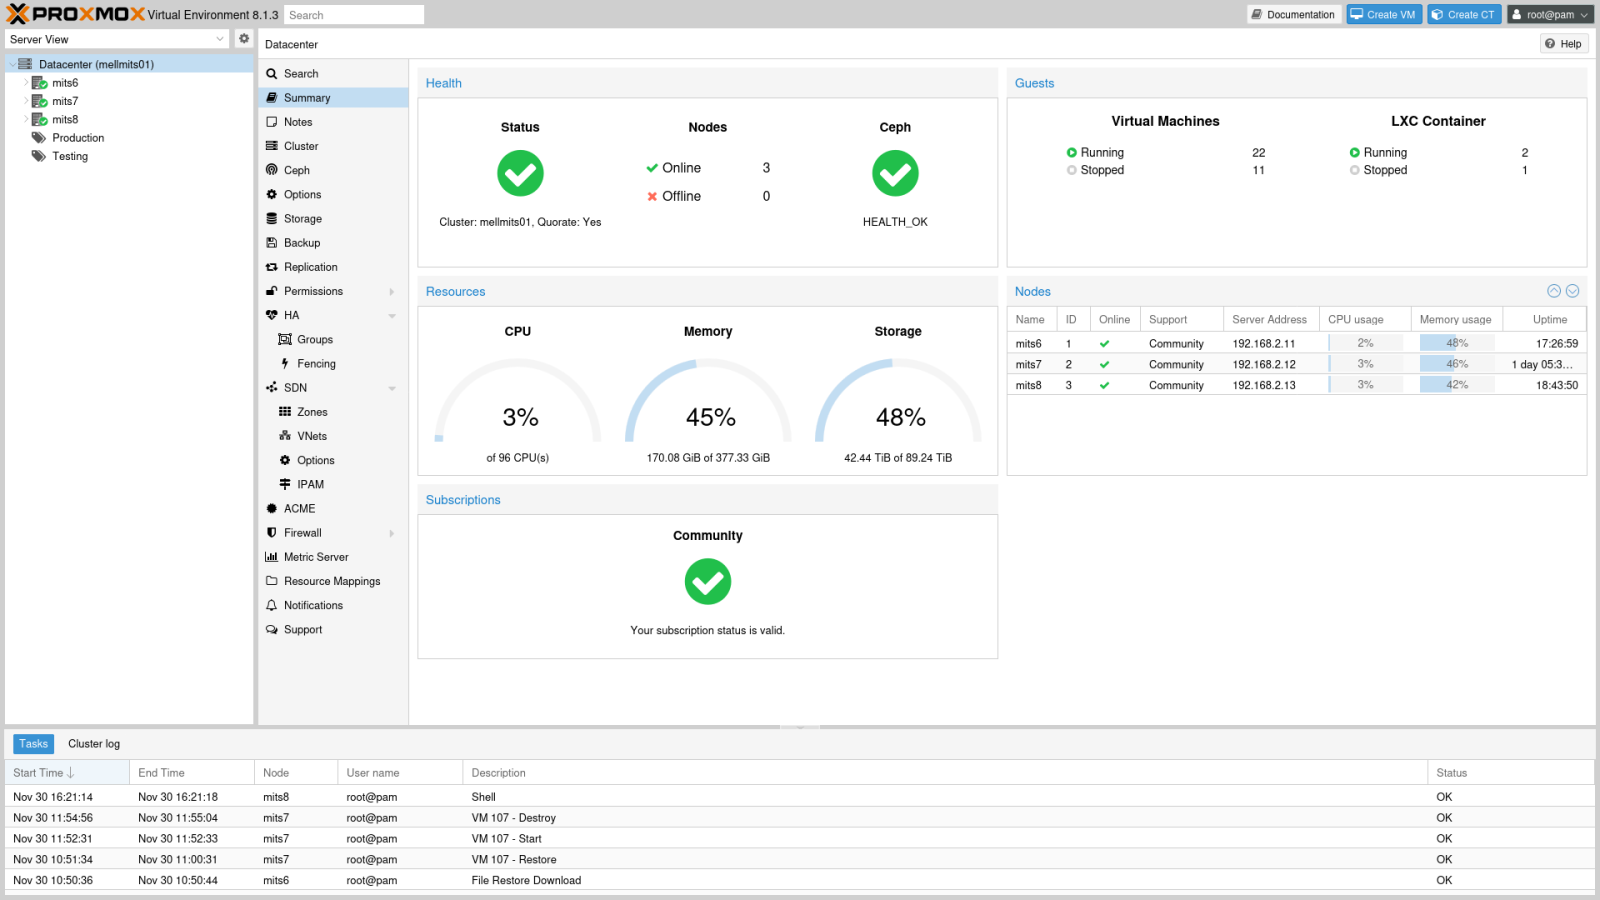
Proxmox VE is a virtualization platform based on Debian Linux that uses KVM (Kernel-based Virtual Machine) as its hypervisor and LXC for containers.
Architecture and Management
Unlike VMware ESXi, Proxmox is not a bare hypervisor without an interface:
- Web-based management interface running directly on the host
- Create and manage VMs, configure networks, and schedule backups - all through the browser
- Hosts, VMs, storage and clusters can be managed centrally in the browser
One Host = Hypervisor + Management
A Proxmox node combines hypervisor and management; the comparison of the components is in the component comparison below. Multiple Proxmox nodes can be connected into a cluster and managed centrally - without a separate vCenter instance.
Component Comparison: VMware vs. Proxmox
Hypervisor and Management
| Aspect | VMware | Proxmox |
|---|---|---|
| Hypervisor | ESXi (Bare-Metal) | KVM (Linux-based) |
| Management | vCenter Server (separate instance) | Integrated Web Interface |
| Management License Cost | Additional license required | Free, included |
Virtual Machines
- VMware: VMDK format for virtual disks, VMX configuration files
- Proxmox: QEMU formats (QCOW2 or RAW), proprietary configuration syntax
- Guest Tools: VMware Tools have their counterpart in the QEMU Guest Agent
- Snapshots and Clones: Both systems support these features
Networking
| Aspect | VMware | Proxmox |
|---|---|---|
| Virtual Switches | vSwitch / Distributed vSwitch | Linux Bridges (default) or Open vSwitch |
| VLAN Configuration | Via Port Groups | Directly on the VM network interface |
| SDN (Software-Defined Networking) | VMware NSX | External solutions or Open vSwitch |
Storage
| Aspect | VMware | Proxmox |
|---|---|---|
| File System | VMFS (proprietary) | Flexible: ZFS, LVM, Directory, Ceph, NFS, iSCSI |
| Thin Provisioning | Available | Works with virtually any storage |
| Snapshots | Available | Storage-dependent (ZFS, LVM, QCOW2) |
Important Note: The Proxmox migration tool currently does not support VMware vSAN as a source. VMs on vSAN must be moved to supported storage (e.g., NFS or local VMFS) before migration.
High Availability and Live Migration
| Feature | VMware | Proxmox |
|---|---|---|
| Live Migration | vMotion (new purchases only in paid subscription bundles; existing perpetual licences with vMotion keep it after SnS expiry, Broadcom KB 429208) | Integrated, free |
| HA Cluster | vSphere HA (license required) | Integrated, free |
| Automatic Load Balancing | DRS (Distributed Resource Scheduler) | Dynamic load balancing in the Cluster Resource Scheduler since PVE 9.2, for now for HA-managed guests |
Backup and Recovery
| Aspect | VMware | Proxmox |
|---|---|---|
| Integrated Backup | No - APIs for third parties (Veeam, etc.) | Yes - directly in the web interface |
| Additional Costs | License costs for backup software | Free (basic) / Proxmox Backup Server for advanced features |
| Automated Backups | Via third-party tools | Schedule configurable directly in the GUI |
Tip: The Proxmox Backup Server (PBS) offers efficient incremental backups with deduplication and compression.
Bonus: LXC Containers
In addition to VMs, Proxmox also supports LXC containers - lightweight Linux containers with no direct VMware equivalent. These can virtualize certain services more resource-efficiently than full VMs.
Conclusion
Migrating from VMware to Proxmox changes the hypervisor and management tools. Licensing costs, storage, guest drivers and backup procedures determine whether the switch fits the environment.
Benefits at a Glance
- Import wizard already on Proxmox VE 8.1 with updated packages transfers VMs largely automatically
- VMware VMs remain as a safety net (copy, not move)
- Greater independence from commercial vendors and their pricing models
- Full feature set in the free version - the subscription adds the enterprise repository and vendor support
Who Should Consider Switching?
The transition is particularly worthwhile for:
- Organizations with rising VMware licensing costs
- Small and medium businesses affected by the end of free ESXi for production use
- Technically skilled administrators who value transparency and flexibility
- Organizations with GDPR requirements wanting to operate their infrastructure on European servers
Migration Support
WZ-IT handles inventory, target planning and execution of VMware migrations, including HA cluster and backup setup. Subsequent operations can be agreed as Managed Proxmox. WZ-IT also takes an existing Proxmox environment into operation without a migration: Proxmox management for existing environments, followed by Managed Proxmox from €179.90 net per node and month. The VMware to Proxmox Migration page describes reference architectures, hardware requirements, migration steps and FAQ.
Book an intro call · [email protected]
References
- Automatic Migration from VMware ESXi to Proxmox - heise online
- Tutorial: How to Transfer VMware VMs to Proxmox - Computer Weekly
- Proxmox: import wizard announcement, 27 March 2024 (package versions for VE 8.1)
- Proxmox VE 8.2: release with import wizard
- Proxmox VE Roadmap: 8.2 development cycle
- Proxmox VE Administration Guide: Importing Virtual Machines
- VMware by Broadcom - Licensing Changes
- Broadcom: ESXi 8.0 Update 3e release notes (free vSphere Hypervisor)
- Proxmox wiki: Migrate to Proxmox VE (preparation, live-import, manual migration, post migration)